10 Simple Kite Paper Designs for Your Window: Part 2
June 16, 2025, by Erin Kemppainen
Welcome back to the world of paper folding!
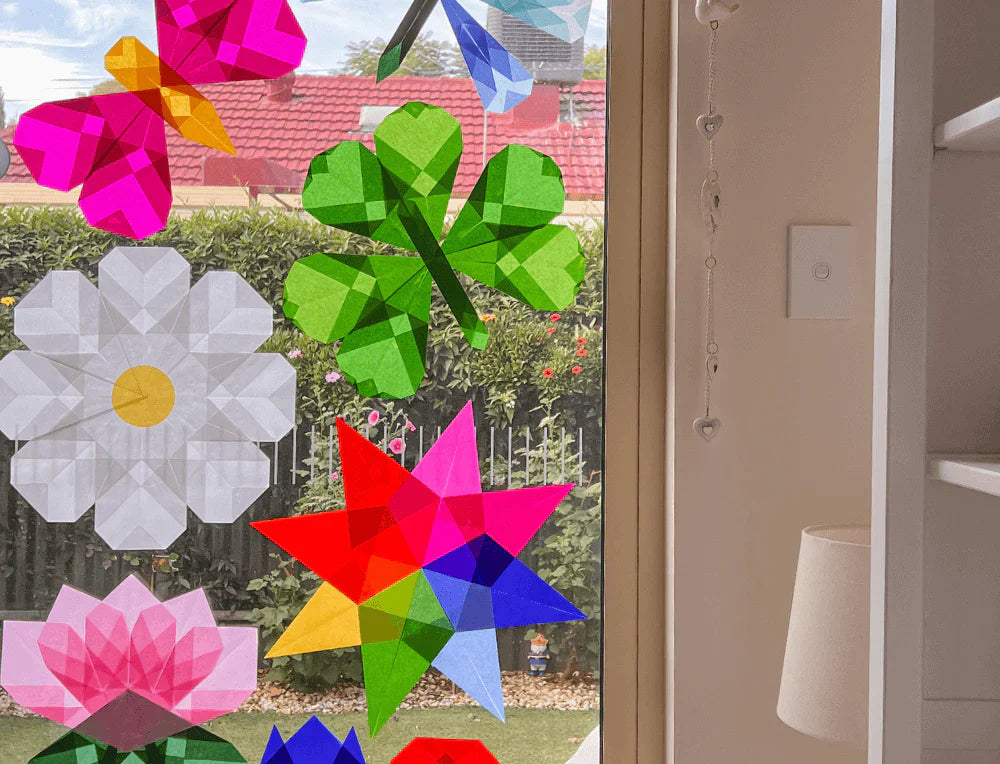
After the joy and colour of Part One, we couldn’t resist sharing even more stunning designs to brighten your home. In this second part of our series, we’ll walk you through additional kite and silk paper creations—each one perfect for catching the light and sparking joy in every corner of your space.
Whether you’re crafting with little hands or indulging in a moment of mindful creativity for yourself, these new designs are just as fun and easy to follow. We’re continuing with Mercurius Window Star Folding Kite Paper (16x16cm), but feel free to mix things up with any of our beautiful Origami, Folding and Craft Paper.
Don’t forget to gather your crafting essentials—glue stick, ruler, pencil, and scissors—and share your masterpieces with us using #OskarsWoodenArk on Instagram or Facebook. We can’t wait to see what you create next!
Snowflake
We recommend mastering the folds in this first design as we will reference back to in most of the other pieces.
For this design, you will need eight pieces of paper in either white or light blue.

Step 1

Begin with a square piece of paper.
Step 2

Fold the paper in half diagonally to form a triangle.
Step 3

Unfold the paper to reveal a crease.
Step 4

Fold the paper in half diagonally in the opposite direction to form another triangle.
Step 5

Unfold the paper again to reveal an X-shaped crease.
Step 6

Fold two adjacent corners to meet the centre line.
Step 7

Repeat steps 1-6 eight times, before joining each one together at the previous piece's centrefold to create your snowflake.

Sunflower
For this design, you will need sixteen pieces of yellow paper for petals, and one piece of brown for the centre.
Step 1

Follow steps 1-6 in the Snowflake tutorial.
Step 2

Fold one of the bottom edges inward so they align with the centre fold, creating a point at the bottom.
Step 3

Repeat on the other side.
Step 4

Repeat steps 1-3 sixteen times, before assembling your sunflower by joining each piece to the previous piece's centrefold.
Step 5

Finally, cut out a brown circle for the centre and attach to the assembled petals to complete your sunflower.
Cloud
For this design, you will need four pieces of white paper.

Step 1

Follow steps 1-6 in the Snowflake tutorial, and steps 1-3 in the Sunflower tutorial. Repeat four times.
Step 2

Fold the upper left corner down to meet the center fold.
Step 3

Tape each of the four pieces together at the edges to form your cloud.

Raindrop
For this design, you only need one piece of blue paper per raindrop. Should you wish to create some smaller raindrops, you can cut a single 16 x 16 cm piece into quarters.
Step 1

Follow steps 1-6 in the Snowflake tutorial, step 1-3 in the Sunflower tutorial, and step 2 in the Cloud tutorial.
Step 2

Make a small fold one side of the upper left point.
Step 3

Repeat on the otherside to form your raindrop.
Carrot
For this design, you will need one piece of orange kite paper, and one piece of green paper cut into four squares.

Step 1

Follow steps 1-6 in the Snowflake tutorial, steps 1-3 in the Sunflower tutorial, and step 2 in the Cloud tutorial.
Step 2

Follow steps 1-6 in the Snowflake tutorial and steps 1-3 in the Sunflower tutorial.
Step 3

Fold the left side into the centre fold to form a point.
Step 4

Repeat on the other side to form one of carrot's leaves.
Step 5

Repeat steps 2-4 to form the carrot's stem, before taping each piece together at the edges.
Step 6

Attach the stem to the back of the carrot to finish.

Snowdrop
For this design, you will need one piece of white paper and two pieces of green.
Step 1

Follow steps 1-4 of the Snowflake tutorial.
Step 2

Make a fold in the bottom about 1.5cm in size.
Step 3

Turn the design over.
Step 4

Fold the outer right corner at the centre fold to form a parallelogram.
Step 5

Repeat on the other side.
Step 6

Reapt steps 1-5 for one of the green pieces of paper to create the outer layer of the snowdrop.
Step 7

Fold the other green piece in half.
Step 8

Reapt step 7 until you can't fold anymore.
Step 9

Make a bend.
Step 10

Assemble the three pieces to form your snowdrop.
Bunny
For this design, you will need three pieces of white paper, and one piece of pink (cut into quarters).

Step 1

Follow steps 1-6 in the Snowflake tutorial, steps 1-3 in the Sunflower tutorial, and step 2 in the Cloud tutorial twice with the white pieces of paper to form the outer ears.
Follow steps 1-6 in the Snowflake tutorial, and steps 1-3 in the Sunflower tutorial twice with the pink pieces to form the inner ear.
Attach the pink pieces to the centre of the white pieces to form the entire ears.
Step 2

Follow steps 1-5 in the Snowflake tutorial.
Step 3

Fold one of the adjacent corners to meet the centre line before unfolding it to reveal the crease you have made.
Step 4

Fold the corner in so it meets the newly made crease.
Step 5

Fold the adjacent corner to meet the centre line.
Step 6

Repeat on the other side.
Step 7

Repeat for a third time.
Step 8

Open up the two outside folds you have just made in steps 6 & 7 to reveal the creases.
Step 9

Fold each outer corner in to meet the newly made creases to form the bunny's head.
Step 10

Follow step 1-5 in the Snowflake tutorial.
Step 11

Fold three out of the four corners inwards to meet the centre.
Step 12

Fold in one side to meet the centre fold.
Step 13

Repeat on the other side.
Step 14

Fold down the top section in half to form the nose.
Step 15

Attached the ears to the back of the head with sticky tape.
Step 16

Attach the nose to the front of the face, and feel free to draw on some eyes for the final touch.

Bee
For this design, you will need one piece of yellow, one piece of white and one piece of black.
Step 1

Cut your pieces so you have the following: one quarter of yellow, two ninths of white and one ninth of black.
Step 2

Follow steps 1-6 in the Snowflake tutorial, and steps 1-3 in the Sunflower tutorial.
Step 3

Fold down one of the upper sides to meet the centre fold.
Step 4

Repeat on the other side so it is symmetrical on all sides.
Step 5

Repeat for both pieces of the white, and one of the black.
Step 6

Back to the yellow piece, fold in one of the points so it meets the inward point of the other side.
Step 7

Follow step 6 for the two white pieces which will be the things.
Step 8

Follow step 6 for the black piece.
Step 9

Repeat step 6 on the other side to form the bee's head.
Step 10

Attach the head to the body with tape.
Step 11

Attach the wings to the body.
Step 12

Cut the left over piece of black paper into strips for the stripes, sticking them to the body with glue.
Ladybird
For this design, you will need two pieces of red paper, and three pieces of black.

Step 1

Follow steps 1-6 in the Snowflake tutorial, steps 1-3 in the Sunflower tutorial, and step 2 in the Cloud tutorial for two pieces of red and one piece of black.
Step 2

Follow steps 1-6 in the Snowflake tutorial, and steps 1-3 in the Sunflower tutorial.
Step 3

Fold in each of the four sides to meet the centre fold.
Step 4

Fold in one of the points so it meets the inward point of the other side.
Step 5

Repeat on the other side to form the ladybird's head.
Step 6