Skip to content
10% OFF all Christmas LAYBY orders - This Week only 🎄
10% OFF all Christmas LAYBY orders - One Week only 🎄
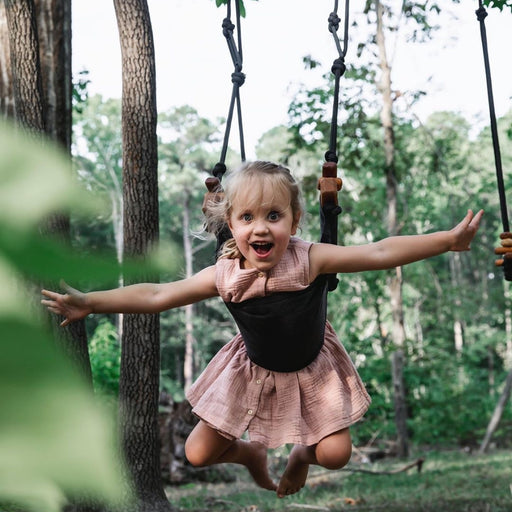
A girl playing on a Solvej Swing.

Indoor SOLVEJ Swing Installation Guide | Oskar's Wooden Ark

Solvej Swings are both beautiful and practical - the kind of piece that feels just as at home inside as it does outdoors. While they're often pictured hanging from a tree or a timber frame in the garden, many families find they're just as easy to enjoy indoors.

Whether you're creating a calming space for regulation, encouraging a bit more movement on a rainy day, or simply don't have the outdoor space for a swing frame, a Solvej Swing can be safely installed inside your home.

Here's how to do it properly, step by step.

Setting up the space for a Solvej Swing.

Selecting the Right Space

The most important part of any indoor installation is what you're hanging the swing from and where you are going to put it!

1. Give the swing plenty of room to move. Choose a spot with clearance in front, behind and to each side, and clear away furniture, sharp edges or anything breakable from the swinging path. This gives children the freedom to move safely without bumping into anything nearby. Popping a rug or play mat underneath can also help create a softer landing area.

2. Find a strong structural support. Your swing should only ever be attached to a solid structural timber beam, ceiling joist, or other load-bearing support - never a decorative beam or plasterboard ceiling on its own. If you're at all unsure whether a beam is structural, it's well worth checking with a qualified builder or carpenter before you install anything.

Once you've found the right spot, it's time to think about hardware.

Choosing the right support and hardware for a Solvej Swing.

Choosing and Fitting the Hardware

3. Use heavy duty hanging hardware designed for overhead loads. Many families choose galvanised or stainless steel eye bolts or eye screws from hardware stores like Bunnings, then pair these with the stainless steel carabiners that come with your Solvej Swing. Just make sure everything you use is appropriately load rated for your chosen beam.

If drilling into a beam isn't an option in your home, a securely fitted doorway pull-up bar designed to support dynamic loads can be a good alternative - just check the manufacturer's weight limits first.

4. Adjust the height before use. Set the ropes so the seat sits at a comfortable height for your child - younger ones should be able to get on and off easily with a hand if needed, while older children might prefer it a little higher. Take a moment to check both ropes are even, so the seat hangs level.

Safety checks and supervision for a Solvej Swing.

Safety Checks and Supervision

A few simple habits go a long way in keeping swing time safe and enjoyable.

5. Check everything before each use. Inspect the ropes, knots, carabiners and hanging hardware for any signs of wear or loosening. Give the swing a firm test with your own weight before your child hops on, and keep checking components regularly as part of your normal routine.

6. Time to Play! While Solvej Swings are designed with children in mind, it's best to keep an eye on little ones while they play - supervision is always recommended! Encourage your child to sit in the centre of the seat, hold onto the ropes, and avoid twisting, standing or jumping from the swing.

With the right setup and a few regular checks, an indoor Solvej Swing will quickly become one of the most loved corners of your home.

PLAY: Open-Ended Discovery

From timeless wooden toys to creative play ideas, find inspiration for every day

Let's Play!

Our Most Recent Posts: